Showing posts with label toddler-approved. Show all posts

Monday, March 11, 2013

Yummy Black Bean Soup

Image via Google

I love a good black bean soup.  Warm, hearty, tasty and I don't feel guilty if I go back for a second bowl (and then another one in the evening). 

Abe's been watching his waistline again, so after indulging in some less-than-healthy food the day before, he requested a healthy dinner the next morning.  And I happily agreed.  Until it was about 30 minutes before he was to come home and I had forgotten about dinner.  Oops.

A bit panicked, I remembered I had a bunch of black beans in the freezer.  So, black bean soup it was.  I looked around for a recipe that would be a bit different than the sometimes bland ones I've made in the past.  I hit the jackpot with this one! I think it's the best black bean soup I've made in a while.

So easy and so yummy.  The celery seed and cumin add a bit of a twist and you can spice it up or keep is on the mild side for the kids by reducing the pepper flakes, like I did.  A bottle of hot sauce at the table will let the braver ones add more heat.

Full of fiber and protein, this will stick to your ribs during a cold night.  It freezes well, too, so double up and you'll have dinner waiting for you the next time you're like me and forget to cook. 

I served with a leafy green salad.

Recipe from Melissa D'Arabian.

Yummy Black Bean Soup 
Serves 4-6

2 celery stalks, chopped
1 carrot, chopped
1 onion, chopped
3 tablespoons olive oil
2 teaspoons dried oregano
1 teaspoon ground cumin
1/2 teaspoon red pepper flakes
1/2 teaspoon celery seeds
3 cloves garlic, minced
2 cups cooked black beans
1 tablespoon vegetarian (or chicken bouillon base)
1 bay leaf
One 14-ounce can diced tomatoes
Kosher salt and freshly ground black pepper
 
Cook the celery, carrots and onions in the olive oil in a large saucepan over medium heat until soft, about 5 minutes. Add the oregano, cumin, red pepper flakes, celery seeds and garlic and cook until fragrant. Add the black beans, bouillon, bay leaf and tomatoes, and enough water to cover by an inch or two (about 3 cups). Simmer for at least 30 minutes, up to 2 hours, adding water if needed. Season and serve.


Monday, October 22, 2012

Garlic Hummus


Abe is the breakfast cook in this house.  I cook the vast majority of dinners, but if there's a weekend breakfast being whipped up, you're likely to find my man at the stove.  It's a girls' dream. :)

One of his famous breakfasts is his garlic hummus.  It was taught to him by his mother, who was taught by her mother and so on.  Middle Eastern cooking at its finest.  When I first saw him make it, I was surprised to see him boiling the chickpeas right in the can on the stove.  While I convinced him to start doing it in a pot, he still makes it sometimes like that.

The recipe is in Abe's words.  It will be some of the yummiest hummus you'll ever have (those are my words).  Make it for breakfast, a quick dinner or anytime!


Garlic Hummus

1-3 cloves fresh garlic
Dash of cumin
1/2 teaspoon salt
3 tablespoons tahini
3 tablespoons lemon juice
1 tablespoon olive oil
1 can of chickpeas  (or equivalent dry chick peas, soaked over night in water)
1 tablespoon plain yogurt

Bring can of chickpeas to a boil.

Grind the garlic in a food processor.  1 clove minimum.   3 cloves gives a fairly strong garlic flavor (more than that can be certified Garlic Flavor). Add tahini, salt, cumin, lemon juice, olive oil.

Using a straining spoon, add the chickpeas.  Save the liquid from the chick peas.

Add the contents of the pot to the food processor.  After initial grind, add tablespoon plain yogurt.
Continue food processing, slowly adding liquid from the chick pea boil until you get your desired consistency.    Be careful, once you get too liquidy, it is tough to go back...

During final processing, one could add flavors....fresh parsley or fresh cilantro, or even roasted peppers.

Serve on plate, adding a dash of paprika if desired, but most definitely a table spoon or two of olive oil.

Monday, March 26, 2012

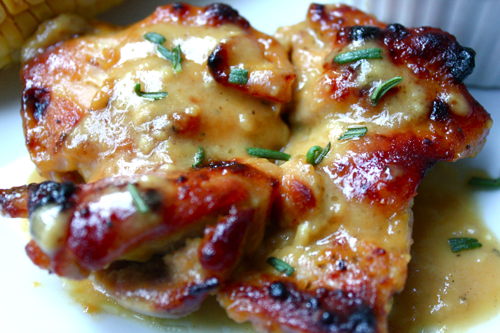
Man-Pleasing Chicken

Courtesy of Witty in the City

Much like with Angry Chicken, I was compelled to make this dish solely on the name.  I mean, come on... I've got a man.... I'm trying to please him..... it appeared to be a no-brainer.  It didn't hurt that I was low on supplies and it had only 4 ingredients, all ones that I had.

Scary simple, just mix 3 ingredients together, pour over the chicken and bake.

Abe's reaction?  "Um, this chicken IS man-pleasing!"   And then proceeded to eat the extra I had made for the following day's lunch.

That's Man for Yummy.

I used bone-in thighs, but you can easily adjust to use boneless or breasts.  Just make sure to adjust your time down.  Use a meat-thermometer to check your temps.

I got this recipe from a blog called Witty in the City.

Man-Pleasing Chicken
Serves 3

1 1/2 pounds of bone-in chicken thighs
1/2 cup  dijon mustard
1/4 cup maple syrup (the real stuff)
1 tablespoon rice wine vinegar (or cider vinegar)

Preheat oven to 450. Place chicken in a baking dish.  Combine the mustard, maple syrup and vinegar in a bowl and pour over chicken, flipping chicken to coat.

Bake, uncovered, for 40 minutes or until meat thermometer reads 180 degrees.

Let rest for 5 minutes. Sprinkle with fresh rosemary, if you feel so inclined.


Tuesday, November 22, 2011

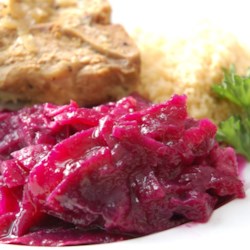
German Red Cabbage

Photo courtesy of cookin mama via Allrecipes.com
One of the foods that instantaneously brings me back to my mom cooking in the kitchen is her red cabbage.  The smell and taste says Mom.  It's tangy and sweet at the same time and has a bit of spice from the clove and bay leaf.  I could literally eat it all day long and would request it for part of my last supper.  Adam LOVES it so much and calls it "Oma's Purple".

It's chock full of vitamins and is a great way to use up that red cabbage you bought on sale, but had no idea what to make with it.  It goes great with pork and chicken dishes, especially.

If getting a large cabbage, you might have to increase spices, sugar and vinegar.

You really should use whole cloves, peppercorns and allspice berries.  I know many won't have that in their pantry, but it's good to have on hand.  If you absolutely don't want to get the whole berries, I'd use 1/8 teaspoon ground clove, 1/4 teaspoon ground allspice and a good couple of grinds of ground pepper.  Add a pinch more at the end of the cooking if it needs more, but be very careful with these strong flavors!

If you don't have a spice bag or a piece of cheesecloth, just add the whole spices and pick the large pieces out before serving.

German Red Cabbage
Serves 6


1 medium head red cabbage, cored and sliced
2 large tart apples, peeled and sliced
1 medium sweet onion, sliced and separated into rings
1 1/2 cups water
1 cup cider vinegar
1/2 cup sugar
1 tablespoon butter
1 teaspoon salt
6 whole peppercorns
2 whole allspice
2 whole cloves
1 bay leaf
2 teaspoons cornstarch
2 teaspoons cold water


In a Dutch oven, toss cabbage, apples and onion. Add water, vinegar, sugar, butter and salt. Place the peppercorns, allspice, cloves and bay leaf on a double thickness of cheesecloth; bring up corners of cloth and stir with kitchen string to form a bag. Add to Dutch oven. Bring to a boil. Reduce heat; cover and simmer for 1-1/4 hours.
 
Discard spice bag. In a small bowl, combine cornstarch and cold water until smooth; stir in cabbage mixture. Bring to a boil; cook and stir for 1-2 minutes or until thickened.

Thursday, October 27, 2011

Strawberry Ghost Treats

Sorry about the photo quality.  My camera is broken and this is taken with my phone

Adam is 3 today! Happy Birthday, my big boy!  I can't believe it's been 3 years already since you entered our lives.  Love you so much!

I wanted to make something for Adam's birthday treat for preschool party.  I didn't know if I should do a traditional brownie or cookie.  I know they had restrictions on cupcakes, so that was out.  The teacher mentioned "... and they will even eat fruit", so I ran with it.  I found this on a website and thought it was the perfect little bite since Adam's birthday is so close to Halloween.

They were so easy to make.  The only thing I would suggest is maybe using melted chocolate with a toothpick to draw on the face.  The icing I used was easy to apply, but doesn't dry completely and can smudge easily.  Another suggestion I got was to use edible decorating pens.

Your kids will love helping you make these and even the littlest ones can help.  The real trick is to make sure the strawberries are super dry and room temp when you start, so I'd suggest washing them the night before and letting them dry.  Even then, I dabbed each strawberry before dipping. 

The shortening is crucial to get it to be smooth and shiny, so don't skip it.   And you might need to re-nuke the chocolate once or twice as you're going through the strawberries since it can get a bit clumpy.  I'd stick it in for another 10 seconds when it does that.

Adam's teacher and class loved them!  He did too and looked so proud when bringing them in.  I am for sure going to make them each Halloween.

So, grab some strawberries, some chocolate and get to making some yummy ghosts for this Halloween! 

Oh and the best part is someone has to lick the chocolate bowl clean..... might as well be you!

Strawberry Ghost Treats

1 carton of strawberries
1 11-ounce bag of white chocolate baking chips
1 1/4 teaspoon shortening
Black icing tube, melted milk chocolate chips or edible decorating pen

Put white chocolate in a microwavable bowl with shortening.  Microwave for 10 seconds and stir.  Microwave another 10 seconds and stir.  Continue until chocolate is melted and smooth.

Dip dried strawberry in melted chocolate 3/4 the way up. Set down on a cookie sheet that has been covered with waxed paper.  Let the chocolate trail off to make the ghosts tail.  Freeze 5 minutes or allow to air dry. 

Paint on face. 


Tuesday, October 11, 2011

20 Dinners, 1 Day: Rigatoni with Apple and Squash


I had been looking forward to doing this one.  I love pasta, even though I don't make it nearly as much as I should.  Plus, add butternut squash to the mix and I'm there.

The bacon was tricky for this vegetarian.  I was originally going to make the recipe and add bacon just to Abe's portion.  But a recent cholesterol check made adding it maybe not such a good idea (he's had high cholesterol since his 20s, even though he's pretty fit).  So I improvise with using a bit of liquid smoke in olive oil to add some smoky flavor.

If you're not dealing with high cholesterol, I'd recommend using the bacon, though.  :)

The dish was very yummy and it was extra good the next morning for breakfast.  Hey, it was Adam's idea.  He did balance things out by having waffles and syrup for lunch that day.

The butternut adds a bit of sweetness and the apples and onions add the savory.  But I think the cheese makes the dish delicious, so don't skip it.  Not that I thought you would.

I didn't do the sage leaves this time because I didn't have them.  So, I sprinkled about 1/2 teaspoon of dried sage into the butter.  The idea of fried herbs intrigues me, so I will try it next time.

Rigatoni with Apple and Squash
  
1 lb. rigatoni pasta 
8 oz. bacon, thinly sliced 
10 sage leaves 
2 shallots, minced 
1 tart apple, sliced 
3 cups Roasted Squash, chopped 
1/2 cup grated Parmesan cheese 
Salt and pepper 
1/4 cup chopped fresh parsley

Cook pasta until al dente. Drain, reserving 1 cup cooking water. In same pot, cook bacon until just crisp; transfer to paper towels. Add sage to hot bacon fat and cook until crisp, 2 to 3 minutes. Transfer to plate. Add shallots and apple and cook, 5 minutes. Add pasta, squash, cooking water, bacon and parmesan; season with salt and pepper and toss. Top with crumbled sage and parsley.

Thursday, June 9, 2011

Chicken and Dumplings

Photo courtesy of Google Images


Holy heck.  How did so many months pass by without a blog update?  I blame it on work, a vegetarian Lent season and lots and lots of Jimi's baseball games, where Abe is the coach and therefore doesn't come home until well after dinnertime.  I do apologize (well, to the 2 of you who missed me.  Muah!  I love ya).
I got a request from a lady on the parenting message board that I practically live on.  She wanted a homemade and easy chicken and dumpling recipe to replace the store bought she had been using.  I've never made one and was pretty sure that Abe and Jimi hadn't eaten it, so what an adventure for all of us.  So, I went to my mainstay, Food Network (Rachel Ray) and found one that Abe deemed so worthy of company.  Jimi LOVED it.  I mean, loooooved it.  I think he might have licked the plate before putting it in the sink that night.

It's got a cheat- store bought biscuit dough.  I know, real foodies would scoff at using a boxed biscuit mix.  So, for those of you with tons of time on your hands, go knock yourself out your favorite biscuit dough recipe.  The rest of us will do fine with with Jiffy Mix.  It's not like real foodies are reading this blog anyway.

I plan on busting this out for my mom's 80th birthday dinner with the family.  

Chicken and Dumplings

1 1/2 pounds chicken breast tenders
1 tablespoon olive oil
2 tablespoons butter
1 russet potato, peeled and diced
2 medium carrots, peeled and diced or thinly sliced
1 medium onion, chopped
1 rib celery, diced
1 bay leaf, fresh or dried
Salt and freshly ground black pepper
1 teaspoon poultry seasoning
2 tablespoons flour, a handful
1 quart chicken broth or stock
1 small box biscuit mix
1/2 cup warm water
Handful flat-leaf parsley, chopped
1 cup frozen green peas


Dice tenders into bite size pieces and set aside.

Place a large pot on stove over medium high heat. Add oil, butter, vegetables and bay leaf and cook 5 minutes, stirring frequently. Season mixture with salt, pepper and poultry seasoning. Add flour to the pan and cook 2 minutes. Stir broth or stock to the pot and bring to a boil. Add chicken to the broth and stir.

Place biscuit mix in a bowl. Combine with 1/2 cup warm water and parsley. Drop tablespoonfuls of prepared mix into the pot, spacing dumplings evenly. Cover pot tightly and reduce heat to medium low. Steam dumplings 8 to 10 minutes. Remove cover and stir chicken and dumplings to thicken sauce a bit. Stir peas into the pan, remove chicken and dumplings from heat and serve in shallow bowls.

Monday, March 28, 2011

White Bean Soup with Pasta and Rosemary Oil

Yes, I'm realizing as I sit to write this that I've been adding a lot of soup recipes.  But they are so easy to make, homey and usually made with things I have in the pantry already. 

So, bear with me.  I promise to have something different next time.  And once lent is over, the chicken thigh recipes will resume.

The rosemary oil can me made ahead of time, strained and kept in a air-tight container.  It adds an herbal essence to the soup and adds a silky finish.  
 The original recipe called for using dried beans, but I didn't have the time.  So I used canned, which I think is fine for a soup.  If you want to use dried, they suggested covering the beans in boiling water while prepping the other ingredients. Then simmering them for about an hour.  Add 2 teaspoons of salt and continue cooking for about 30 more minutes until tender.

Adam loved it so much that he ate 3 bowls of it.  I think I might try freezing it in batches for a quick dinner for him.  He kept calling it "chicken" despite my attempts to tell him they were beans. 

I realized after I made the recipe that I forgot to add all of the liquid (originally it called for 3 quarts of water).  I like the thickness of the soup, so I'm keeping it the way I made it.

White Bean Soup with Pasta and Rosemary Oil
Serves 4

The Rosemary Oil

1/3 cup extra virgin olive oil
2 tablespoons finely chopped rosemary or 2 tablespoons dried
2 garlic cloves, sliced

The Soup

2 cups cannellini, navy, garbanzo beans or a mixture
2 tablespoons olive oil
1 tablespoon chopped rosemary or 2 teaspoons dried
1 onion, finely diced
2 carrots, finely diced
1 celery rib, finely diced
5 garlic cloves, sliced
1/3 cup chopped parsley
1 cup diced tomatoes, fresh or canned, with their juices
4 cups vegetable or chicken stock
Salt and freshly milled pepper
1 cup dried small pasta- shells, lumache or other favorite shape (I used fusilli)
Grated parmesan cheese

Slowly warm the extra virgin olive oil with 2 tablespoon rosemary and 2 garlic cloves until the garlic begins to color, about 3 minutes.  Turn off the heat and set aside until needed.

Heat 2 tablespoons olive oil (not the rosemary oil) with 1 tablespoon rosemary (2 teaspoon dried) in a soup pot over medium heat.  Add the onion, carrots and celery and cook until the onion is softened and starting to turn color in places, about 10 minutes.  Stir in the garlic and parsley and cook for a few minutes more.  Add beans to the pot along with the tomatoes and stock.  Bring to a boil, reduce and simmer for 30 minutes. 

Cook the pasta in boiling salt water, then drain.  Strain the rosemary oil.  Ladle the soup into bowls and add some pasta to each.  Drizzle some of the oil over each bowl and add pepper to taste.  Cover with shaves of parmesan. 
 

Sunday, March 13, 2011

Hearty Bean and Barley Soup


Abe's trying to go more vegetarian for Lent.  I originally thought he had wanted to go ALL veggie for Lent and was so excited to finally have main dishes that I could eat on a regular basis.  But, alas, he decided that he wouldn't be able to do it full-time and would only do it "as best he could".  Meh.  Well, I'm still doing my veggie recipes.  So there.

Today was one of those unplanned-oh-no-what's-for-dinner? kind of days.  I had plenty of stuff in the fridge, but no idea what to make.  So I threw a few ingredients into the search engine of Cookinglight.com and voila!  I came up with yet another soup recipe.  

It is delicious!  And very filling.  Not to mention healthy.  So, pretty much a trifecta of win for soups.

I made the mistake of not having the quick-cook barely, so I had to cook mine for a lot longer.  If you have it and like a softer barely, soak the barely in a bowl of water overnight.

I got the recipe from Cookinglight.com.

Hearty Bean and Barley Soup
Serves 8 (serving size: 1 cup with 1 tablespoon cheese)

7  cups  fat free, less-sodium chicken broth
1/4  teaspoon  crushed red pepper
6  garlic cloves, crushed
2  (4-inch) rosemary sprigs
1  (19-ounce) can dark red kidney beans, rinsed and drained
2  teaspoons  olive oil
1  cup  chopped onion
1  cup  finely chopped carrot
1/4  cup  chopped celery
1  (14 1/2-ounce) can diced tomatoes, undrained
1  cup  uncooked quick-cooking barley
10  cup  torn spinach leaves (about 4 ounces)
1/4  teaspoon  freshly ground black pepper
1/2  cup  (2 ounces) grated fresh Parmesan cheese

Bring first 4 ingredients to a boil in a Dutch oven; reduce heat to medium-low, and cook 15 minutes. Drain through a sieve into a large bowl; discard solids.

Measure 1 cup beans, and mash with a fork in a small bowl. Reserve the remaining whole beans.

Heat oil in pan over medium heat. Add onions, carrot, and celery; cook 4 minutes. Add broth mixture, mashed beans, whole beans, tomatoes, and barley; bring to a boil. Reduce heat; simmer 15 minutes.

Stir in spinach and black pepper; cook 5 minutes or until barley is tender. Sprinkle each serving with cheese.

Tuesday, March 8, 2011

Carrot, Broccoli and Cheese Orzo


Adam is usually my big eater.  He will eat anything.  I would brag to family how he'd eat things like brussel sprouts and spinach.  He's a terrible sleeper, so I figured he made up for it in eating.

But when he's sick, he suddenly becomes a fussy eater and will pick at his meals, hardly eating a bite.  And it tends to linger, so weeks will go by with him living off of yogurt, suddenly acting like a college girl trying to fit into a dress.   And, to get him to eat, I find myself offering things like cheddar bunnies and olives, things I know he will eat, just to get something in his belly.  But that's not healthy for every dinner and I don't want him to get too used to that kind of eating habits.

So, I decided to check out my favorite kid-friendly food blog and see what she had for healthy suggestions.  And the latest one looked like a hit.  Healthy and yet something I can see Adam digging into.  And when I tasted it.... SURPRISE! It tasted pretty good.  So, it's going to be my dinner tonight too!  I wouldn't suggest it as a main course, but give it a taste when you cook it up for your little one and see if maybe it wouldn't make a quick and healthy lunch for you.

I love how easy it is.  I literally whipped it up in 15 minutes.

This recipe is from weelicious.com.

Carrot, Broccoli & Cheese Orzo 
Serves 4

1 Small Garlic Clove
1 Small Shallot
1 Cup Baby Carrots
1 Cup Broccoli Florets
2 Tbsp Unsalted Butter or Olive Oil
1 Cup White or Whole Wheat Orzo
1/2 Tsp Salt
1 Cup Water
1 1/2 Cups Low Sodium Chicken Broth
1/3 Cup Parmesan Cheese, grated

1. Place shallot and garlic in food processor and pulse to chop.

2. Add baby carrots and broccoli florets to the food processor and pulse, scraping down the sides half way until finely chopped.

3. In a large stock pot, heat 2 tbsp of butter or olive oil and sauté the chopped vegetables, raw orzo and salt for 4 minutes stirring continuously.

4. Add the water and broth to the pot and cook over medium heat for 10
minutes uncovered, or until the liquid starts to evaporate and the mixture thickens.

5. Add the Parmesan cheese and stir to combine.

6. Serve.

Monday, February 21, 2011

Tuscan Bean Soup


I'm a sucker for a good soup.  I love finding everything I need in the pantry and even if not, I love how you can swap one ingredient out for what you do have.  They are warm, delicious and often time, low-cal enough to let you gorge on one extra bowl.

Abe's been feeling sick, along with much of the household, so homemade soup was in order.  I didn't have time to defrost some chicken to make him his favorite Greek lemon rice soup, so vegetarian it was.  That way I could have a bowl too!

I found this recipe on Cookinglight.com and adjusted it because I did not have 3 cans of chick peas.  I ended up liking the creaminess that the great northern beans added, so I am sticking with that.  You can swap them for any white bean that you have in your pantry.  The vinegar adds a lot of depth and I used the full 2 tablespoons.

It was delicious and Adam gobbled his up.  I can't wait to eat the leftovers for lunch today!

Enjoy!

Tuscan Bean Soup
Serves 6

2  tablespoons  olive oil
2  cups  finely chopped onion
8  garlic cloves, minced
4  cups  water or broth
1  teaspoon  minced fresh or 1/4 teaspoon dried rosemary
3/4  teaspoon  salt
1/4  teaspoon  black pepper
1  (15 1/2-ounce) can chickpeas (garbanzo beans), rinsed and drained
2 (15 ounce) cans Great Northern beans, rinsed and drained
1  (14 1/2-ounce) can diced tomatoes, undrained
1  to 2 tablespoons balsamic vinegar
6  tablespoons  (1 1/2 ounces) grated fresh Parmesan cheese
Handful of fresh spinach leaves (optional)

Heat the olive oil in a Dutch oven over medium heat. Add onion and garlic, and cook for 10 minutes, stirring frequently. Stir in the water and the next 5 ingredients (water/broth through tomatoes), and bring to a boil. Reduce heat, and simmer 20 minutes.

Place 4 cups soup in a blender or food processor, and process until smooth, making sure to open top vent and covering with a clean dish towel.  Return all pureed soup to pan. Stir in the vinegar, add spinach, if using, and bring to a boil. Remove from heat. Spoon 1 1/2 cups soup into each of 6 bowls; sprinkle each serving with 1 tablespoon cheese.

Calories: 373 (22% from fat)
Fat: 9.1g (sat 2.1g,mono 4.5g,poly 1.6g)
Protein: 15g

Wednesday, January 12, 2011

Mexican Black Bean Enchiladas Casserole


You know you can't go wrong with the words "cheese", "enchiladas" and "casserole".  Throw in "black beans" to make believe you're eating healthily and you won't feel quite as bad about enjoying every single bite of this yummy, gooey dish.

Abe and Jimi were expecting a dish made with chicken, so surprise when Mama made it where her vegetarian mouth could enjoy it too.  Abe loved it, but Jimi picked both the red peppers and the black beans out of it.  Quite the feat, I have to say.  He said that it was still ok and would be move to the "great" category if I had put chicken in it instead.   I'll take his suggestion into consideration.  Adam, as usual with most food he's given, devoured it. 

Actually, the base recipe would be good with any kind of switch up.... beef, pork, chicken would be tasty.  Even cubed baked tofu or mushrooms could work.  I can see adding cilantro the next time I make it, plus a dash of chipotle chili.

I got the recipe from vegetarian.about.com. 

Enjoy!

Mexican Black Bean Enchiladas Casserole
Serves 8 (or 4 hungry people)

2 cups chopped onion
1 1/2 cups chopped red pepper
2 garlic cloves, minced
3/4 cup salsa
2 teaspoons ground cumin
2 15.8 ounce cans black beans, drained and rinsed
12 6-inch corn tortillas
2 cups Monterey Jack and Cheddar blend cheese shredded
3 tomatoes chopped (optional)
1/2 cup sour cream (optional)
1/2 cup sliced black olives (optional)

Preheat oven to 350 degrees.

Combine onion pepper, garlic, salsa, cumin and black beans in large skillet and bring to simmer over medium heat. Cook, stirring frequently for 3 minutes.

Arrange 6 tortillas in bottom of 9" x 13" baking dish overlapping them as necessary. Spread half of bean mixture over tortillas and sprinkle with half of cheese. Repeat layering process with remaining tortillas, bean mixture and cheese.

Cover dish with foil and bake 15 minutes.

Carefully remove foil and serve warm. Garnish with tomatoes, sour cream and olives.


Friday, January 7, 2011

Roast Pork with Apples


I belong to a great playgroup in my town.  I've met so many wonderful friends there and we get together pretty regularly.  One of the perks of the group is that whenever one of the women has a baby, we all get together and make the family a meal.  I got 3 weeks worth of meals after Ava was born!


A friend from the group recently got a job offer that sent her out of town for a full month for training.  She's got 2 small children, so it was a bit of a scramble to find care and to make her time away as easy as it could be on her kids and husband.  So, the group got together and decided to make her husband a month of meals so he would have one less thing to do and so our friend wouldn't worry while away.

So, I threw this in my crock pot, hoping that it would taste good.  Abe got half of the meal (hey, I'm not going to cook 2 dinners if I can help it!) and declared it very tasty.  The meat becomes so tender and juicy that it practically fell apart when I tried to slice some for the photo.  The apples cook down to a chunky applesauce. 

I got the recipe from my Not Your Mother's Slow Cooker Cookbook.

Enjoy!

Roast Pork with Apples
Serves 4-6

Cooker: Medium or large round or oval
Settings and Cook Times: High for 1 hour, then Low for 7 to 8 hours

One 3 to 4 pound boned and tied pork loin roast, trimmed of visible fat (I was lazy and skipped this)
Salt and freshly ground black pepper
6 to 7 tart cooking apples, peeled, cored and quartered
1/4 cup apple juice, fruity white wine or champagne
1/4 cup firmly packed light brown sugar
1 1/2 teaspoon ground ginger

Preheat the broiler.  Season the pork roast with salt and pepper and place on a rack in a shallow roasting pan.  Brown it on all sides under the broiler or in a skillet over high heat to remove excess fat; drain well.

Coat the slow cooker with nonstick cooking spray.  Put the apple quarters in the cooker and set the roast on top of them. Combine the apple juice, brown sugar and ginger in a small bowl and spoon over the roast, rubbing it all over.  Cover and cook on High for 1 hour.

Reduce the setting to Low and cook until fork tender, 7 to 8 hours.  Transfer the pork to a warm platter and let rest for 10 minutes.  Slice and serve warm.

Monday, January 3, 2011

Roasted Chicken with Rosemary


 When I first got married, I wasn't much of a cook.  I knew how to make a few recipes, but as a single vegetarian, dinner mostly consisted of salad and ice cream.  I did go through a phase where I was obsessed with Asian noodle soups and trying to recreate Martha Stewart desserts, but once I started seeing the results of all of that cooking on my thighs, I went back to salads (and a little less ice cream). 

One of the first gifts my mother-in-law was a Taste of Home cookbook.  I remember feeling very proud of mine because she got the same one for all of the daughter-in-laws, so it felt like an initiation into the family. I had know her for about 14 years at that point, seeing that I'm best friends with her daughter (hence how I met my husband), but this moment felt like family. 

This was the first recipe that I made for Abe from the cookbook and it was the first time I had ever made a whole chicken.  I remember being very nervous about it, but then amazed at how easy it turned out.  Since then, I've made several different recipes, but always get the same reply from Abe and Jimi....."It's really good, but it's not like your rosemary chicken."  So, while they humor me by trying my newest found recipe, I humor them by making the basic chicken that they love so much.  If I ever find a recipe that tops this one in their mind, I will be sure to run to the blog to post it!

The beauty of the recipe is that it makes 2 guaranteed meals for pretty cheap.  I always take the bones and simmer it in a pot of water with some whole peppercorns, garlic cloves, bay leaf or two and a couple of onions and carrots thrown into a large pot, and make chicken noodle soup the next day.

Recipe by Isabel Zienkosky, found in The Taste of Home Cookbook
Enjoy!

Rosemary Chicken
Serves 9

1/2 cup butter
4 tablespoons minced fresh rosemary or 2 tablespoons dried rosemary, crushed
2 tablespoons chopped fresh parsley
3 garlic cloves, minced
1 teaspoon salt
1/2 teaspoon pepper
1 roasting chicken (5 to 6 pounds)
9 small red potatoes, halved
6 medium carrots, halved lengthwise and cut into 2 inch pieces
2 medium onions, quartered

In a small saucepan, melt butter and stir in rosemary, parsley, garlic, salt and pepper.  Place chicken on a rack in a roasting pan; tie drumsticks together with kitchen string.

Spoon half of butter mixture over chicken.  Place potatoes, carrots and onions around pan and drizzle the remaining butter over them. 

Cover with foil and bake at 350 degrees for 1 1/2 hours, basting every 30 minutes (I'm lazy and skip this part).  Uncover;  bake 30-60 minutes longer or until a meat thermometer reads 180 degrees and vegetables are tender, basting occasionally.

Cover with foil and let stand for 10-15 minutes before carving to allow juices to settle back into chicken.  Serve vegetables with chicken.

Friday, December 3, 2010

Strawberry-Banana Muffins


When you're a stay at home mom of a toddler, you end up baking a lot of muffins.  Well, at least I do.  It's a way to break up the day and give the little guy something fun to do with Mama.  He loves to push his chair up and help me stir the ingredients.  Here's a picture of him in action....


Usually I'm trying to use up old bananas, but today I realized our uber-large carton of Costco strawberries were going bad already.  There's something about being at Costco for too long that makes their ginormous container suddenly seem average size.  Until you get it home and you realize it's the size of your first apartment's bathroom.  Anyway, I digress.

So, off I went to search for a new muffin recipe for the two of us and came across a basic and healthy one.  We both loved it.  I'm thinking this would be a good candidate for a little sweet streusel topping next time.  Mmmmm.

It calls for whole wheat flour, which I know not everyone likes for their baked goods.  I use it because Adam is none the wiser right now.  I use a white whole wheat flour that uses a lighter whole wheat that has a more delicate flavor.  Don't get me wrong, it ain't no white flour.  But it's a big improvement on the standard whole wheat.  If you're not keen on the whole wheat, you can always use 1/2 whole wheat/white flour.  Or just use all white flour.  I won't judge.
 
I got this recipe from Allrecipes.com.

Enjoy!

Whole Wheat Strawberry Banana Muffins
Makes 12

2 eggs
1/2 cup unsweetened applesauce
1/4 cup vegetable oil
3/4 cup packed brown sugar
1 teaspoon vanilla extract
3 bananas, mashed
2 cups whole wheat flour
1 teaspoon baking soda
1 tablespoon ground cinnamon
1 cup sliced strawberries, fresh or frozen unsweetened

  1. Preheat the oven to 375 degrees F (190 degrees C). Grease 12 large muffin cups, or line with paper liners.
  2. In a large bowl, whisk together the eggs, applesauce, oil, brown sugar, vanilla and bananas. Combine the flour, baking soda and cinnamon; Stir into the banana mixture until moistened. Stir in the strawberries until evenly distributed. Spoon batter into muffin cups until completely filled.
  3. Bake for 20 minutes in the preheated oven, or until the tops of the muffins spring back when pressed lightly. Cool before removing from the muffin tins.

Monday, November 22, 2010

Crunchy Oven Fried Tilapia

Crispy and flavorful fish is always great, but often times it has to be fried in order to get that result. Great for the taste buds, but not so good for the waistline (or arteries). 

While this recipe isn't exactly fried fish, it is a tasty and healthy alternative.  Abe and Adam loved it.  Adam even had fun helping me make it.  Well, he mainly watched me make it, while stealing bits of the cornmeal/bread crumb mixture (kids eat the weirdest things).  But it would be an easy meal for older kids to make.  The drizzle of olive oil crisps up the fish.  If you want to avoid the calories, you can spray them with a non-stick cooking spray or even just bake them as is.

I adapted this recipe from one I found on Allrecipes.com.

I served it with roasted maple glazed acorn squash and brown rice.

Enjoy!

Crunchy Oven Fried Tilapia
Serves 4

1/4 cup all-purpose flour
1/4 teaspoon salt
pepper
2 egg white
4 tilapia fillets or loins
1/4 cup dried bread crumbs
1/4 cup cornmeal
1/2 teaspoon dried oregano, crushed
1/4 teaspoon garlic powder
1/8 teaspoon cayenne pepper
Olive oil
  
Preheat oven to 450 degrees F.

Sift or stir flour, salt, and pepper together in a shallow dish, and set aside. In a bowl, beat egg whites until white and frothy. In another bowl, combine bread crumbs with cornmeal and spices.

To bread the fillets, dip first into flour, shaking off any excess, then into egg whites, then into bread crumb mixture. 

Spray a shallow baking dish with non-stick cooking spray. Lay fillets flat in the dish, tucking under any thinner ends or edges for more even cooking. Drizzle olive oil on top of fillets. Bake in the preheated oven for 10 to 15 minutes, or until fish flakes easily with a folk.

Monday, November 8, 2010

Garlicky Roasted Pork Loin

It's no secret that I am not a chef.  I can't create my own recipe and don't even try.  I don't remember what the purpose of baking soda is in a recipe or what braising does to a piece of meat versus searing. 

I'm queen of looking up a recipe online, though, and have gotten pretty good at knowing what my family will find tasty.  I am pretty good at reading the recipe and duplicating it, even if I can't taste it to adjust seasonings.

This recipe, however, is my first semi-own recipe and even came up with its name (super fancy, wouldn't you say?).   And I'm proud to say that Abe loved it so much, he wants me to serve it on Thanksgiving.  So, yea me!   And Jimi gave it a "that was yummy!" kiss of approval.

It came from me realizing that I didn't have a pot roast, but actually had a pork roast (yes, one is beef and the other is pork and the only similarity was the roast part.. duh).   So, the recipe I wanted to do didn't apply.  I scrambled to find a recipe in order to get dinner ready for my hungry boys.  I didn't want to follow the recipe completely, so I modified it to meet my needs.  And I'm glad I did.

Now, it's nothing fancy, but just a tasty way to serve that pork loin you found on sale.   I served it with brown rice and green beans.  Abe and Jimi enjoyed the leftovers the next day wrapped in a tortilla with sauteed onions and salsa.

Enjoy!

Garlicky Roasted Pork Loin

1 (3-4 lb.) boneless pork loin roast
8-10 garlic cloves
1 teaspoon salt
1 teaspoon pepper
1 teaspoon onion powder
1 teaspoon dried thyme
1 teaspoon paprika
1 teaspoon ground mustard
1/2 teaspoon garlic powder
2 tablespoon olive oil

Preheat oven to 325 degrees.

With a paring knife, make small slits over the top of the roast.  Push garlic cloves into each slit. 

In a small bowl, combine remaining ingredients and rub over entire roast. 

Bake, uncovered, in oven for 2 to 3 hours, until meat thermometer reads 160-170 degrees. Let stand 10 minutes before slicing.

Tuesday, September 7, 2010

Pasta with Squash, Brown Butter and Rosemary


We don't eat a lot of pasta in this house.  Not sure why because I do love a good plate of noodles.  I think in the past I've gotten the impression that if it doesn't have a good amount of red sauce on it, Abe's not that into it.  He does love my spinach lasagna, though, so that's my old standby.

When I saw this recipe, something about it just appealed to me.  It looked simple, but tasty.  Plus, I had most of the ingredients, which helps when you're 40 weeks pregnant (today is my due date!).  I just needed a butternut squash, which I figured would hold if I happened to go into labor before getting a chance to cook dinner (which didn't happen).

At first, Abe was a bit hesitant to call this dish a winner... I think his need-for-sauce bias got in the way.  But but the end of the dinner, he exclaimed that it was really tasty.  Phew.  I, myself, loved it.  It has a delicate, yet hardy flavor.  It makes for a great break from the red.  Adam gobbled his up, too, so this might be a nice dish for our little ones.

An easy way to peel the butternut squash is to cut a little off of each end, so there's a flat spot to stand it up on.  Then using a very sharp knife, just run it down the length to remove the skin.

The recipe calls for broken lasagna noodles, which gives the dish a homemade noodle feeling (people will think you're a fabulous cook!).  It's also a great way to use up those broken noodles that are almost always in the box.  Collect them as you use the whole noodles for other things and you will have enough in no time.  Of course, you can use a new box, like I did, and just break them up.

I got this recipe from my Rachael Ray magazine.  Photo is mine, for once (loving my new camera!).

Enjoy!

Pasta with Squash, Brown Butter and Rosemary
Serves 4

One 3-pound butternut squash- peeled, seeded and cut into 1/2 inch cubes
1 onion,   chopped to similar size as squash cubes
2 1/2 tablespoons extra-virgin olive oil
1 1/2 tablespoons chopped fresh rosemary (or 1 1/2 teaspoon of dried)
Salt and pepper
2/3 pound lasagna noodles,  broken into pieces
4 tablespoons butter
1 teaspoon fresh lemon juice
1/2 cup grated parmesan cheese
3 tablespoon pine nuts, toasted

1.  Preheat oven to 400 degrees.  In a large bowl, toss the squash, onion, olive oil and rosemary; season with salt and pepper.  Place on a baking sheet and roast until the squash is tender, about 30 minutes.

2. Meanwhile, in a large pot of boiling, salted water, cook the pasta until al dente; drain and transfer to a large bowl.

3.  In a small skillet, melt the butter over medium heat and cook, stirring occasionally, until golden, about 5-7 minutes.  Stir in the lemon juice.

4.  Add the roasted squash, brown butter and 1/3 cup parmesan to the pasta and toss; season with salt and pepper.  Top with pine nuts and remaining parmesan.

Wednesday, August 4, 2010

Spinach Ricotta Bites


I think a lot of my friends think that I am this great cook who is always making my family homemade meals.  While that rings true for dinner, most of the time, I tend to fall a bit short when it comes to lunch for Adam.  Lunchtime tends to sneak up on my and before I know it, I have a very hungry little boy who lets the whole world know he's needing food.  So, often times, lunch for him consists of a can of soup or a cut up soy dog and some veggies or fruit .  Once in a while, is fine, but I'd like to have healthier go-to options.

Oh and don't even ask when sad little meals are called my lunch....... 

I've been visiting a great website called Weelicious, a food blog created by a mom who wanted to share her kid-friendly and healthy meals.  The woman is a supermom and most of us shouldn't even try to come close to her greatness.  But we can take away some yummy recipes!

This one seemed appealing because it incorporates healthy foods and my latest food tool obsession- the mini muffin tin.  Adam loves anything he can carry in his own hand and eat on the go, so I had to go try it.  Much as expected, Adam loved it and kept asking for more (or in his case, "moah").  They are like cute, little quiches.

The recipe is super easy.  The only tip I wanted to pass along was a nifty trick I just learned of how to squeeze the water out of the spinach.  I used to use the clean dishcloth method, which always burnt my hands and just seemed sort of unsanitary.  Then I read to put the spinach on a plate, lay another plate right on top (facing the same way) and the press together.  Presto!  Dry spinach and not a burnt hand in the house.

Picture and recipe are from weelicious.com

Enjoy!

Spinach Ricotta Bites
Makes 20 bites

2 Tbsp Butter
1 Small Yellow Onion, chopped
1 Garlic Clove, minced
2 Large Eggs, Beaten
1 Cup Ricotta Cheese (low or full fat ricotta will work)
1/2 Cup Mozzarella Cheese, shredded
1/2 Cup Parmesan Cheese, Grated
1 10 Oz Pkg Frozen Chopped Spinach, defrosted and drained WELL
1/4 Tsp Salt

Preheat oven to 350 degrees.

Melt the butter in a sauté pan over medium heat and cook the onions for 4 minutes until tender.  Add the garlic and cook an additional minute then set aside to cool.

Whisk eggs in a bowl and stir in ricotta, mozzarella and parmesan cheeses. Once combined, stir in spinach, salt and cooled onion and garlic mixture.

Pour the mixture into lightly greased mini muffin cups.

Bake for 20-25 minutes or until the filling is set and golden on top.

Thursday, July 22, 2010

Simple Berry Sauce

Adam loves yogurt and can easily eat an adult size one for breakfast or snack.  I happily indulged him until I realized how much added sugar was in one (or high fructose corn syrup).  So I decided to try making a sauce that I could use in plain Greek yogurt.  Not only could I then control the amount of sugar going into my little one, but I could save some money.  Win-win. 

The recipe I found is so simple, I doubted how yummy it would be.  But it was delicious!  I mixed it to Adam's yogurt and he ate it up.  I even ate it on my yogurt and can see it working wonderfully on pancakes, waffles, french toast, ice cream........ 

I got the recipe from Weelicious.com.  The original recipe was for raspberry, but I had a carton of blueberries that was on its last leg, so I made 2 kinds.  The raspberries cooked faster because they were frozen, so I'd add a few more minutes to any fruit that has a tougher skin.  I used a potato masher with the blueberries too.  Next time, I might throw them in the blender.  Adam didn't mind the chunkiness, though.  If you want the sauce to be more like a syrup, omit the cornstarch.

Enjoy!

Simple Berry Sauce

12 oz of fresh or unsweetened berries (raspberries, black berries, blueberries...)
1/4 cup water
1 tablespoon corn starch
2 tablespoons honey (or agave nectar)

1. Combine berries and honey in pot, stirring to combine and using spoon (or potato smasher) to smash down fruit.

2. Bring to a boil and then reduce heat to a simmer.  Simmer until fruit is soft.

3. Whisk corn starch and water in a separate bowl.  Add to fruit and stir until fruit thickens. 

4.  Cool and serve.  Store the rest in the fridge.